
Partitioning your hard drive not only helps in better data management but also offers several other benefits, making it a fundamental practice for any Windows 11 user. When you purchase a computer or laptop, it typically comes with a single hard disk drive (HDD) or solid-state drive (SSD) integrated into the hardware setup. This drive is considered a single unit and is often referred to as the primary or system drive. On this primary drive, the operating system (e.g., Windows, macOS, Linux) is installed, along with various software applications and user data.
Partitioning a hard drive involves dividing the physical drive into separate logical sections, each functioning as its own independent storage space. Each partition is assigned its own drive letter (e.g., C:, D:, E:) or mount point (in Linux), and it appears as a separate volume within the operating system. In this blog post, we will explore the importance of partitioning and provide two different methods with step-by-step guides on how to partition your hard drive in Windows 11.
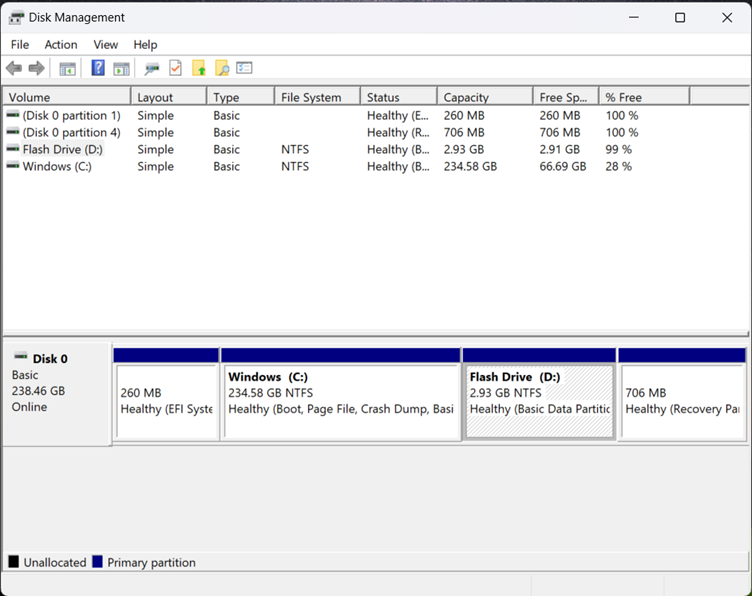
Windows 11, the latest offering from Microsoft, comes equipped with a built-in Disk Management tool that allows users to easily partition their hard drives. This method is suitable for users who need more control over partition sizes, drive letters, and file systems. Here’s when and why you might choose this method:
When to choose:
Why to choose:
Step-by-Step Guide:
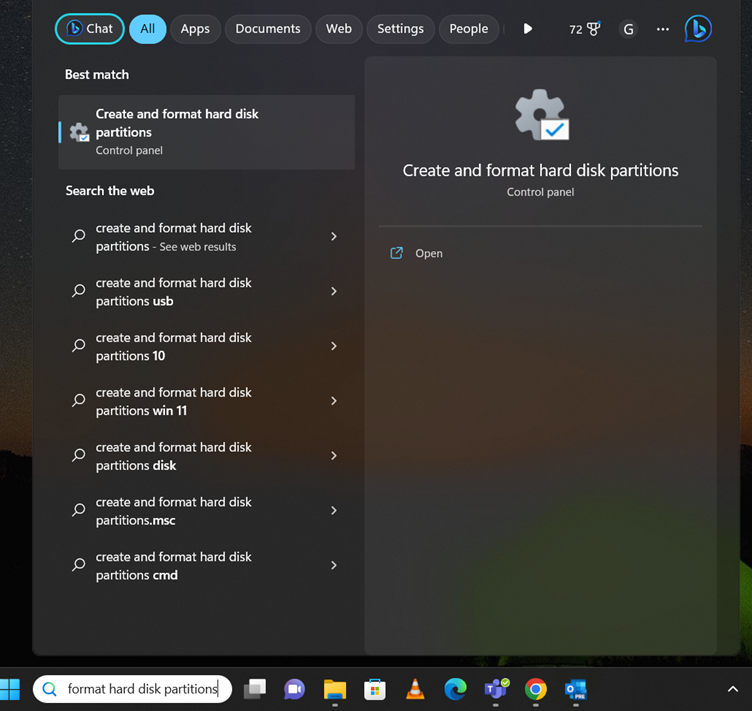
1. Open the Start menu and search for “Create and format hard disk partitions“. Click on the top result to open the Disk Management app.
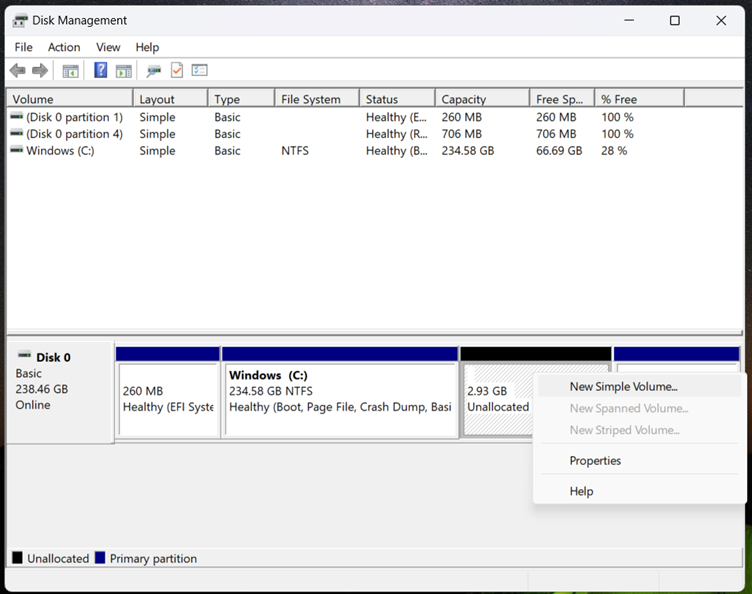
2. Right-click on the drive with “Unallocated” space and select “New Simple Volume“.
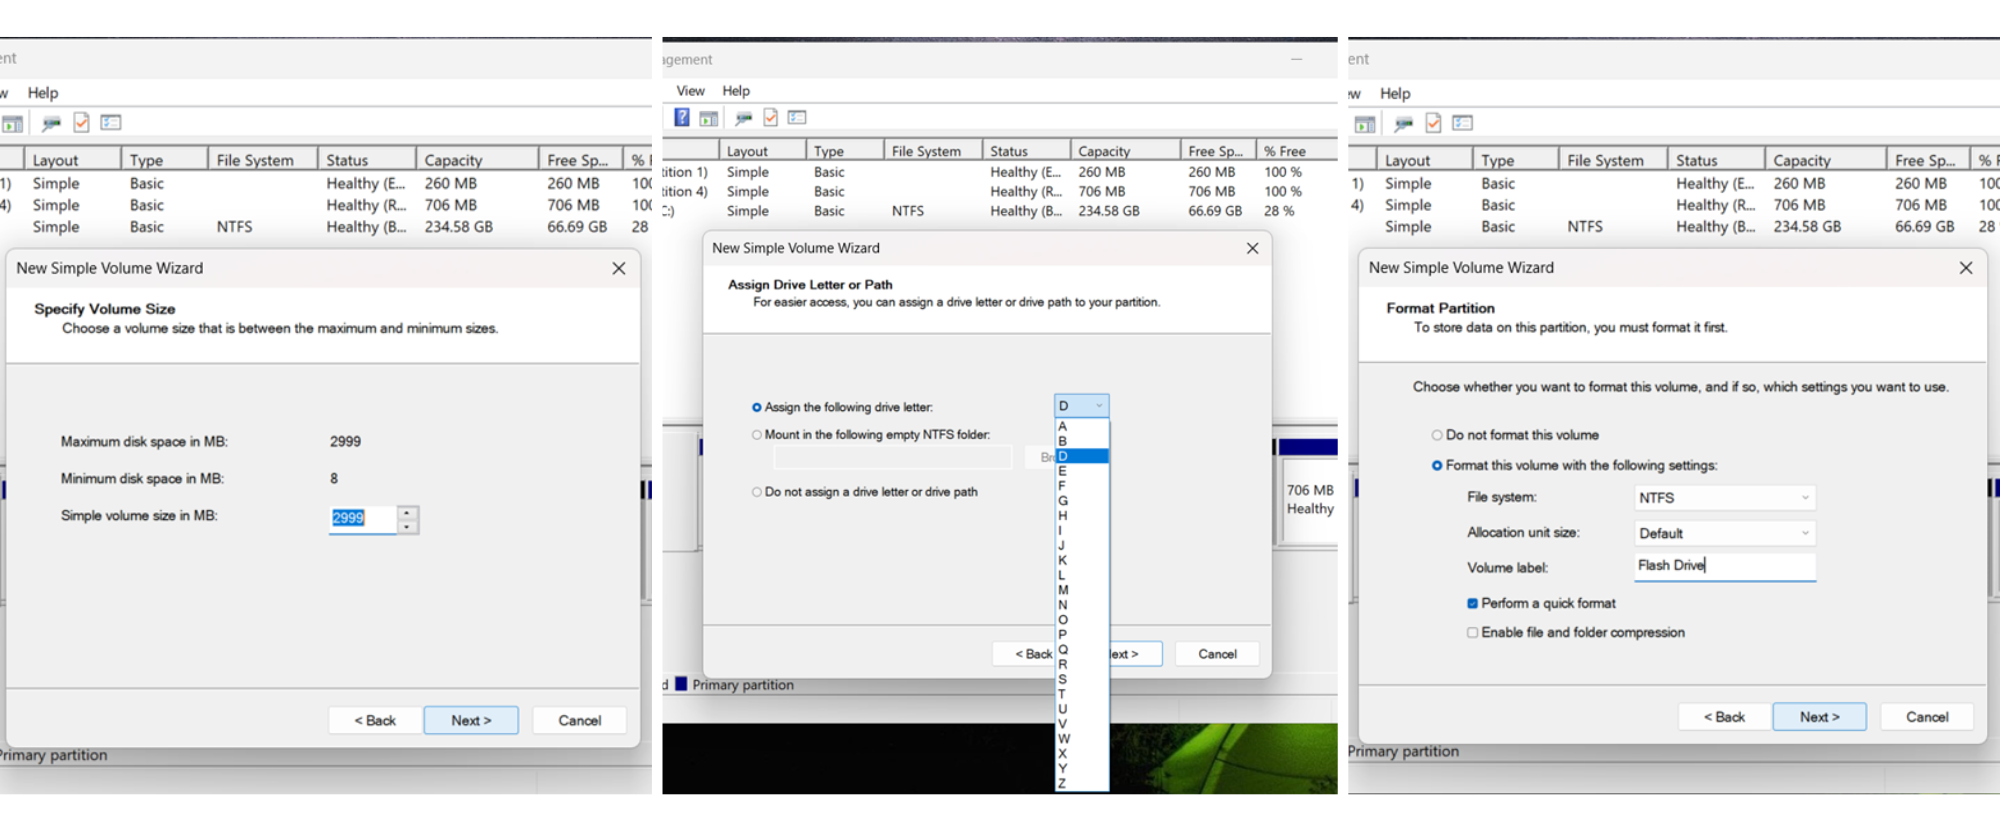
3. Follow the “New Simple Volume Wizard” to specify the size, drive letter, file system, and volume label for the new partition.
4. Click “Finish” to complete the process and create the partition.
Delete and Merge Partitions
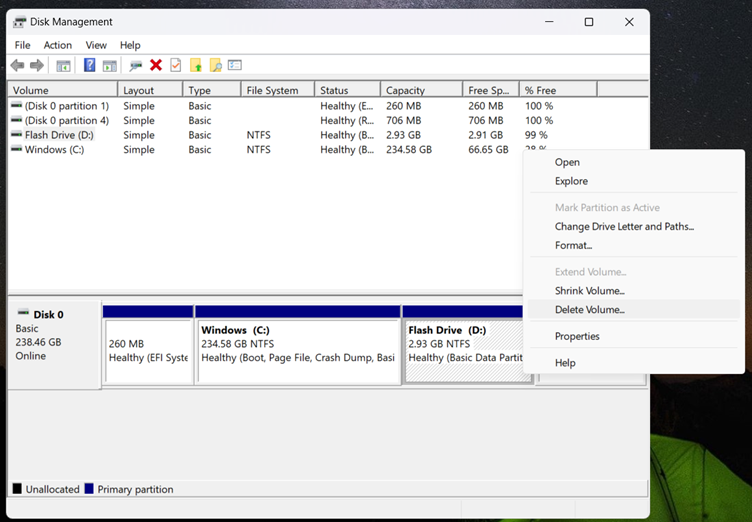
In Windows 11, once you have partitioned your hard disk, you have the flexibility to delete and merge partitions as needed. However, it’s crucial to back up any important data before proceeding, as the process of deleting a partition will result in the loss of all data stored in that partition. Here’s a step-by-step guide on how to delete and merge hard disk partitions in Windows 11 using Disk Management:
Step 1: Open Disk Management: Open the Start menu and search for “Create and format hard disk partitions.” Click on the top result to open the Disk Management app.
Step 2: Select and Delete Partition
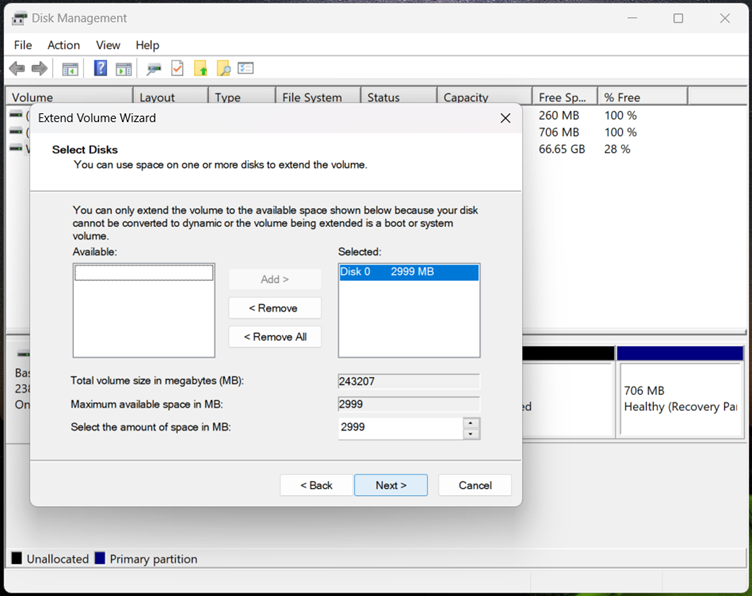
Step 3: Extend Volume
After you have successfully deleted a hard disk partition, the space previously occupied by the deleted partition will now appear as ‘Unallocated’ in Disk Management. To utilise this unallocated space and merge it with another existing partition, follow these steps:
The Settings app provides a user-friendly and straightforward way to create a new partition on your hard drive. This method is ideal for users who prefer a simple and streamlined approach to managing their storage space. Here’s when and why you might choose this method:
When to choose:
Why to choose:
Step-by-Step Guide:
1. Open the Settings app on your Windows 11 PC.
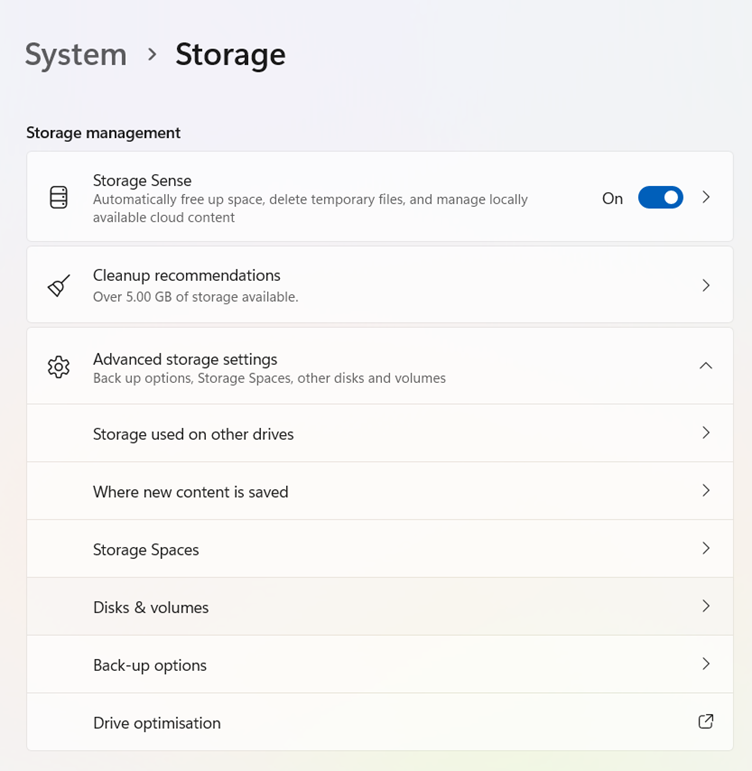
2. Click on “Storage” in the left sidebar.
3. Under the “Storage Management” section, click on “Advanced storage settings“.
4. Click on “Disks & volumes“.
5. Select the SSD or HDD storage where you want to create the new partition.
6. Identify the “Unallocated” space and click the “Create volume” button.
7. Provide a label for the new partition.
8. Choose a drive letter to make the partition accessible in File Explorer.
9. Select the NTFS file system for the partition.
10. Specify the desired size for the partition.
11. Click on “Advanced” and check the “Perform a quick format” option.
12. Click “Format” to create, format, and prepare the partition for storing files.

Partitioning your hard drive on Windows 11 is a fundamental practice that brings numerous benefits to your computing experience. Each method of creating a partition on Windows 11 offers its unique advantages, catering to different user preferences and requirements. The Settings app is user-friendly and perfect for quick and simple partitioning, while Disk Management provides more granular control over partition sizes and configurations. Choose the method that best aligns with your expertise level, partitioning needs, and overall preferences. By doing so, you can optimise your hard drive space, improve data organisation, and enjoy a seamless computing experience on Windows 11.
At Labyrinth Technology, we are a team of passionate and experienced tech enthusiasts dedicated to providing expert guidance and solutions for all your computing needs. With a focus on cutting-edge technologies and user-friendly approaches, we strive to simplify complex concepts and empower our readers and our clients to make the most of their devices and software. Our blog offers a wealth of knowledge, from step-by-step guides to in-depth articles, catering to users of all skill levels. Whether you’re a beginner exploring the world of technology or a seasoned professional seeking advanced tips, Labyrinth Technology is your go-to resource for reliable, up-to-date information.
Our team of experts is here to provide tailored solutions and support for all your tech needs. Whether it’s optimising your storage, enhancing performance, or ensuring cyber security, we’ve got you covered. Join forces with us and let’s navigate the world of technology together. Reach out to Labyrinth Technology today and embark on a seamless and efficient computing adventure with our expert guidance by your side. Let’s create a winning partnership for your Windows 11 journey!


© 2026 Labyrinth Technology Limited. Company number 04326900. Web Design by Netzoll
Empowering London Businesses with Efficient IT Solutions to Save Time and Stay Ahead of the Competition.