

Have you ever thought that Microsoft Teams is running slowly? Obviously there are several considerations if this happens, such as the quality of your broadband connection, or if someone else on that connection is doing something “bandwidth heavy” (such as your partner downstairs on a separate video call!).
But irrespective of these, Microsoft teams is very memory and CPU usage hungry, which can cause the entire PC to slow down if there is no available memory for other applications to run. This can be particularly noticeable when trying to share your screen, and there is significant “lag”. You can see this for yourself in Task Manager. Simply right click the “Start” button to display the “secret start menu” and click on Task Manager.

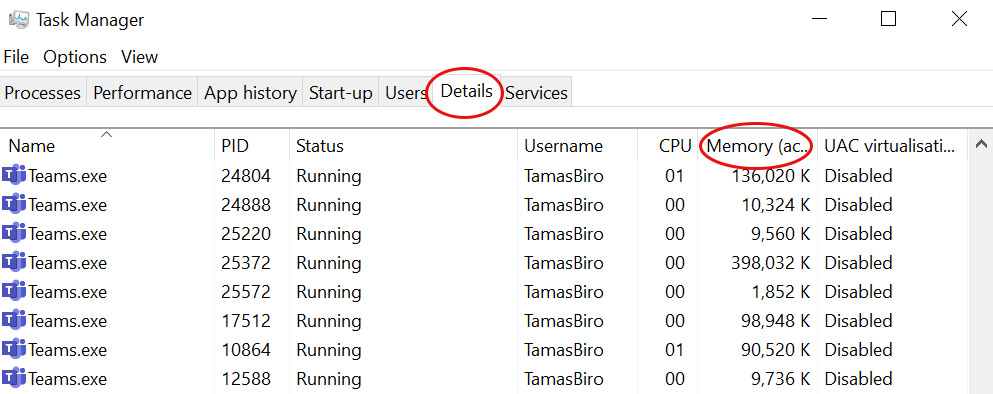
Click on the Details tab, then click on Memory (active private working set), only ONCE to sort the list by the most “memory heavy” applications. Usually you will see Teams right up there at the top of the list, and probably more than once!
So if you suspect you have an issue, here are 3 simple tips that you can try to yourself to make Microsoft Teams run faster. You may not need to do all of these, and we recommend that you try them in the order below.
1. Changing the Settings in Microsoft Teams
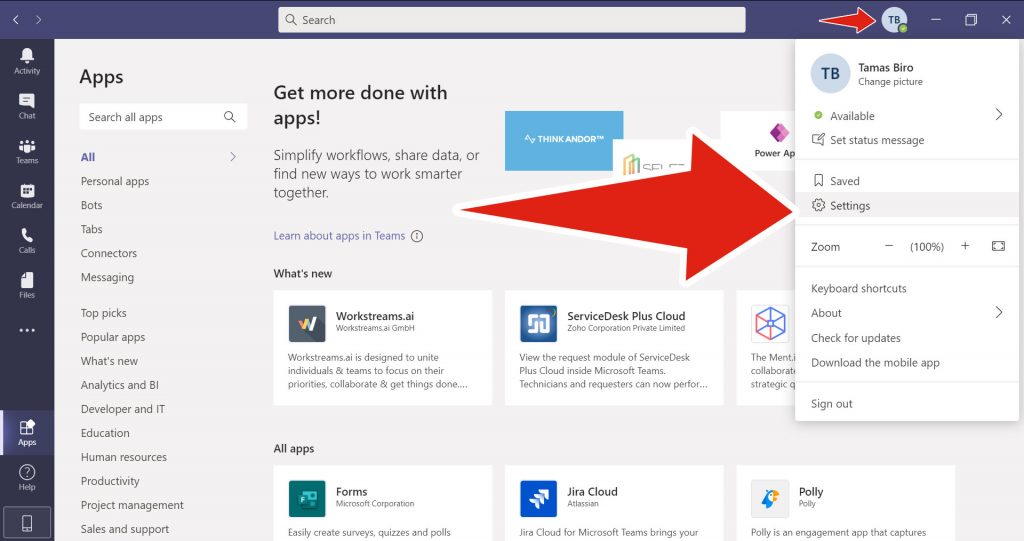
Click on your profile picture and from the drop-down menu select Settings.
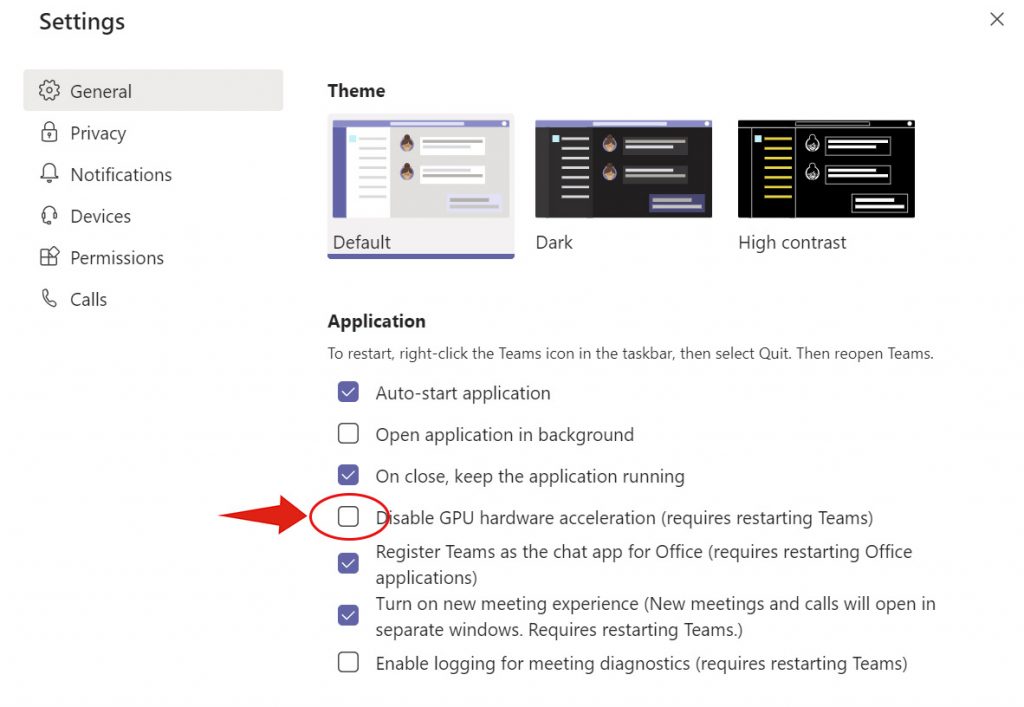
In the pop-up Settings menu that appears, uncheck the box for Disable GPU hardware acceleration and also for Register Teams as the chat app for Office. Once done you will need to re-start the Teams app.
2. Changing the Settings in Microsoft Outlook
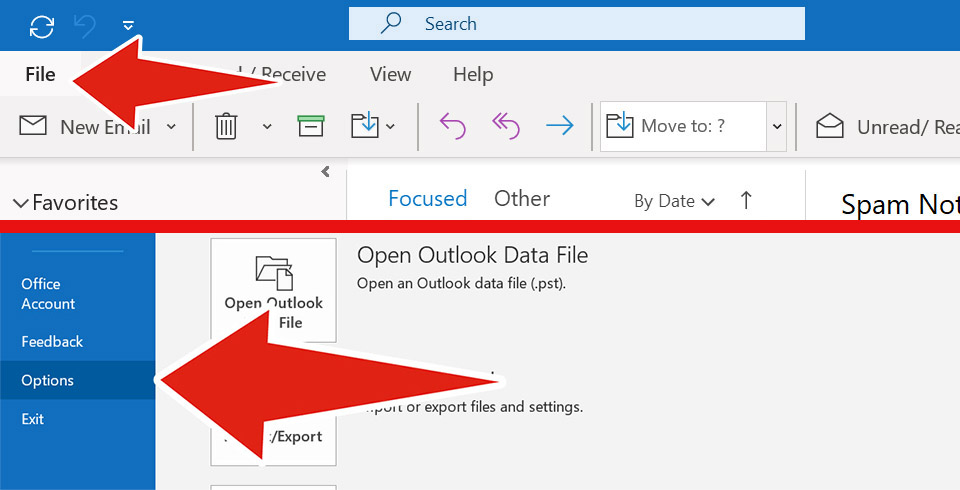
Open Outlook and select File. Then select Options from the Account information screen that appears
Being very careful to follow these instructions correctly, Select Add-ins, and then Microsoft Teams Meeting Add-in for Microsoft Office. Once this is done, click Go.
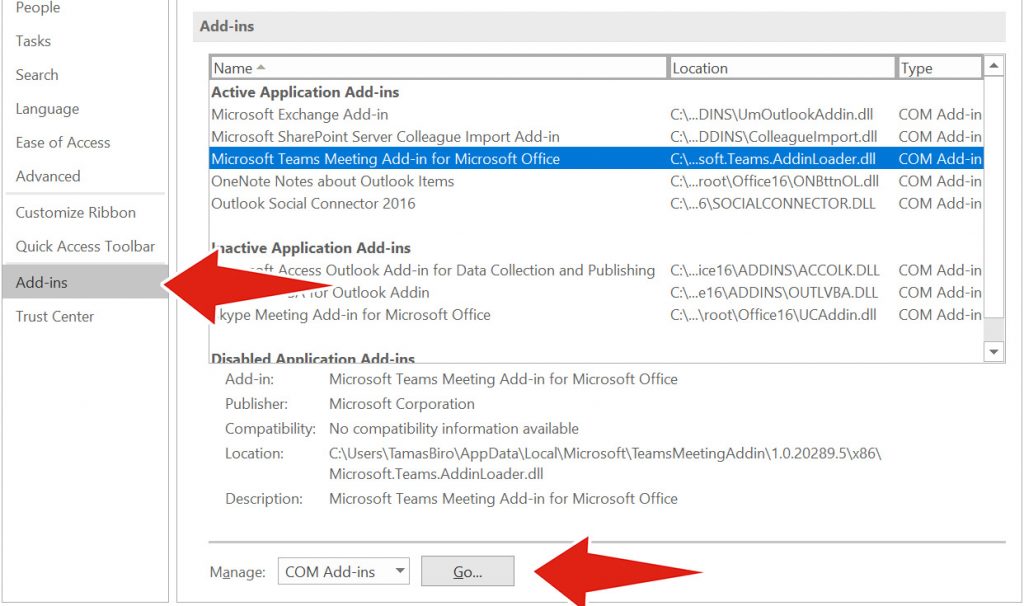
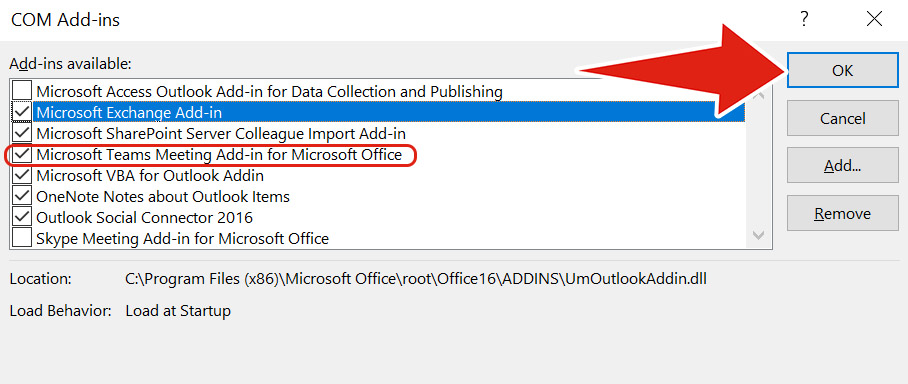
From the pop-up box, locate and uncheck the box for Microsoft Teams Meeting Add-in for Microsoft Office, and click OK to confirm.
3. Clear the Cache in Windows Explorer (CAUTION; FOLLOW THESE INSTRUCTIONS TO THE LETTER!)
For those that don’t know, a cache is a reserved storage location that collects temporary data to help websites, browsers, and apps load faster, and Microsoft Teams has its own cache.
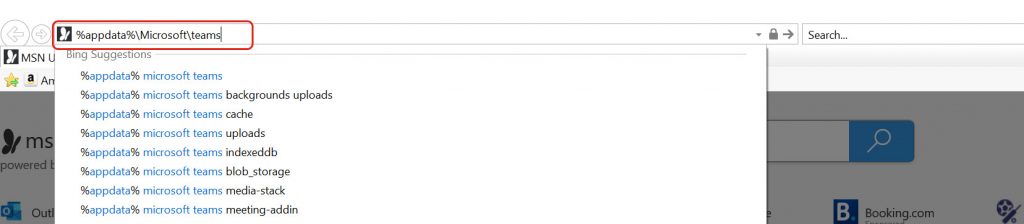
Open Windows Explorer and in the address bar type in to %appdata%\Microsoft\teams (or better still, just copy and paste this from this text).
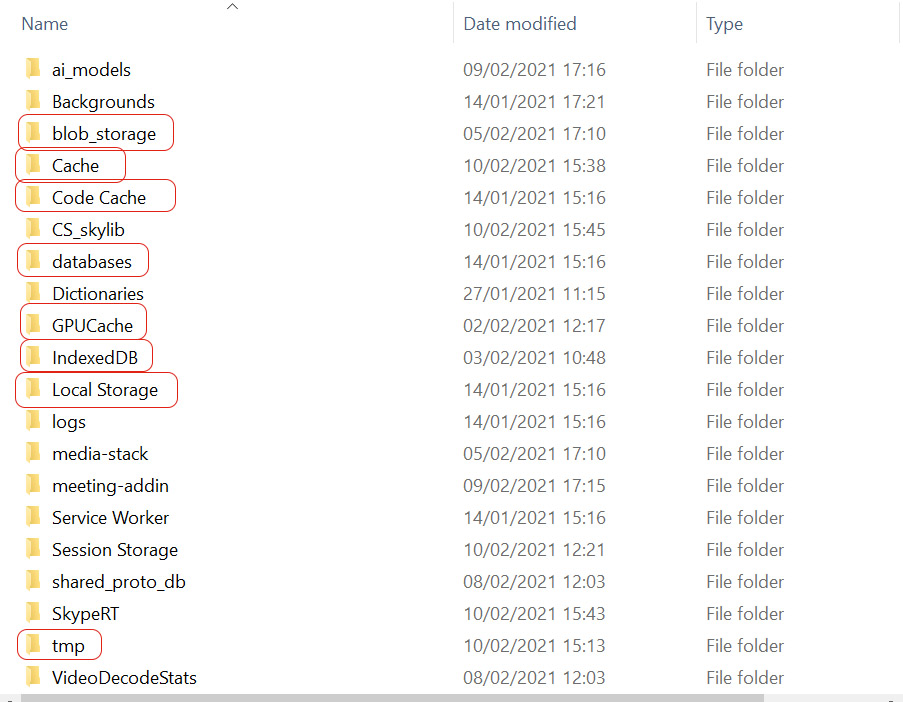
Then do the following very carefully:
In the folder called blob_storage, delete all files.
In the folder called Cache, delete all files.
In the folder called Code Cache, delete all files in it.
In the folder called databases, delete all files.
In the folder called GPUCache, delete all files.
In the folder called IndexedDB, delete the .db file.
In the folder called Local Storage, delete all files.
In the folder called tmp, delete all files.


© 2026 Labyrinth Technology Limited. Company number 04326900. Web Design by Netzoll
Empowering London Businesses with Efficient IT Solutions to Save Time and Stay Ahead of the Competition.