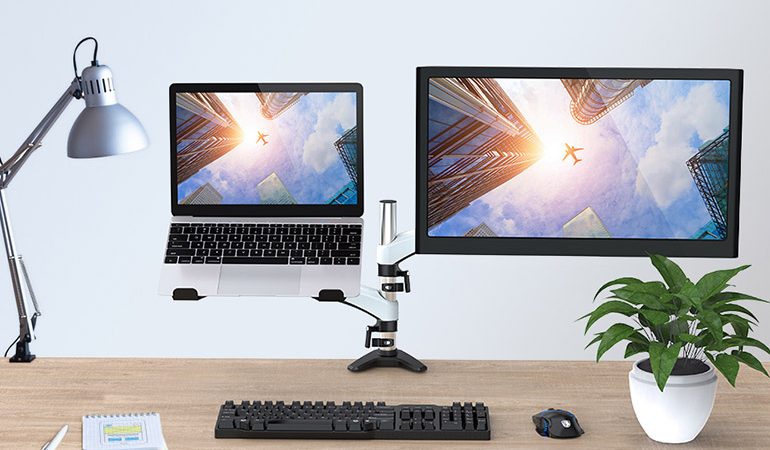

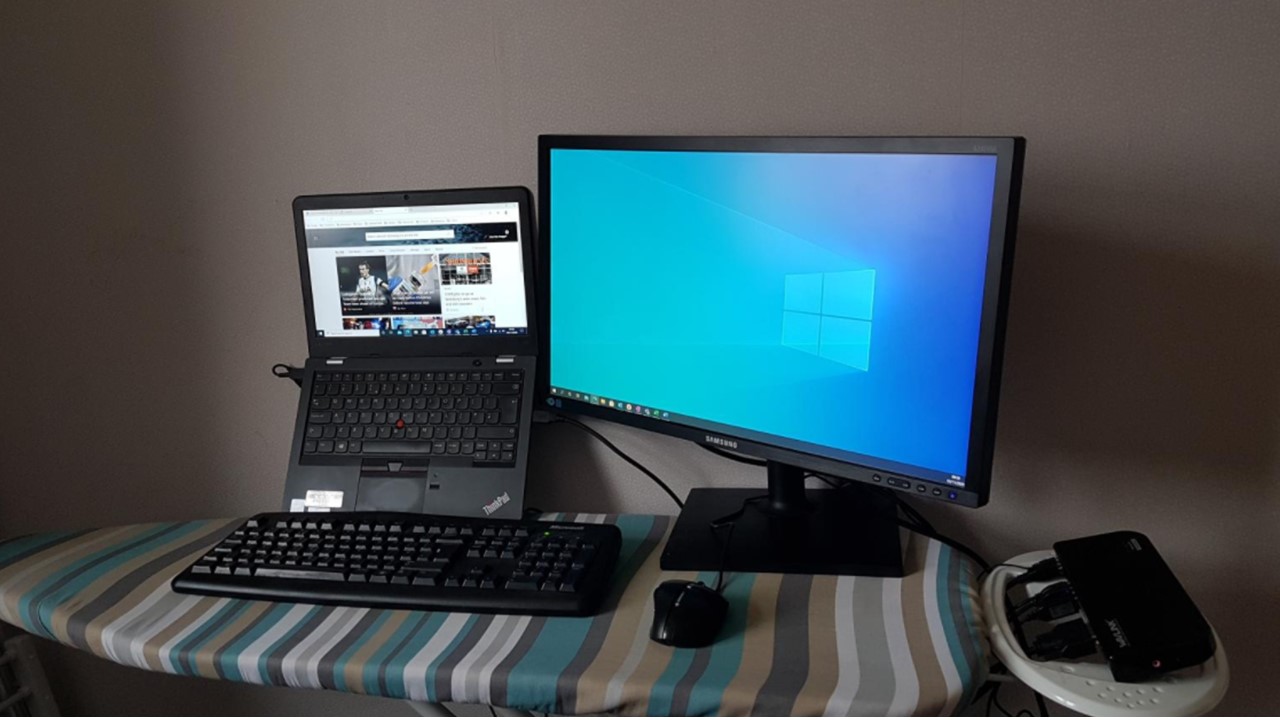
Working from home? On a desk? Maybe the dining room table? Or even an ironing board??
Unless you have a permanent workstation set up in your home, at some point you will probably have to take everything apart and then put it back together again. And as you don’t have an IT team at home it’s up to you to get it right.

If you are lucky enough to be working with additional monitors plugging these in to your laptop, either using a docking station or cable should be relatively straightforward, and if you are simply re-assembling your workstation the monitors will hopefully go back to their previous settings. But what if they don’t? Or what if this is a first-time setup? That’s where the problems might start!
Fear not, just follow our simple guide on how to set up additional monitors with a laptop in Windows 10.
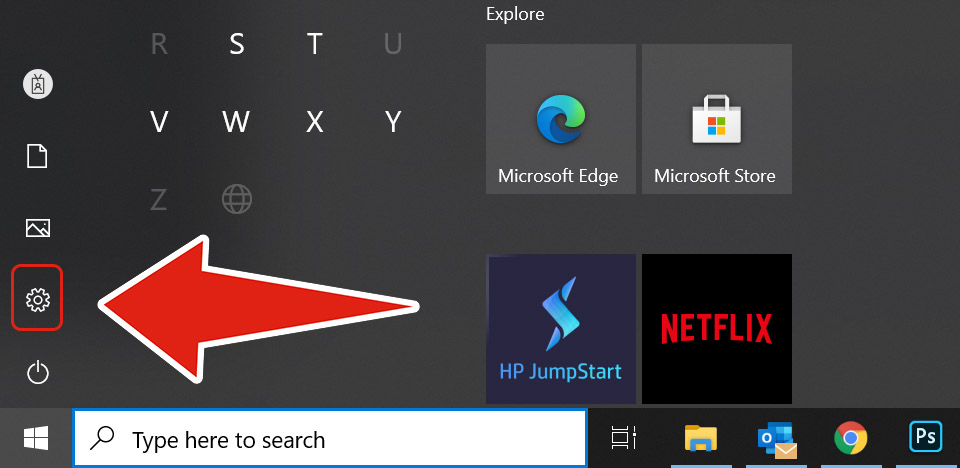
Firstly, click the Windows icon to open your Start menu, and select the cog wheel button to open the settings menu.
From the Windows Settings menu, click on System, and the Display menu should automatically be open for you. If not, search for Display in the left hand menu.
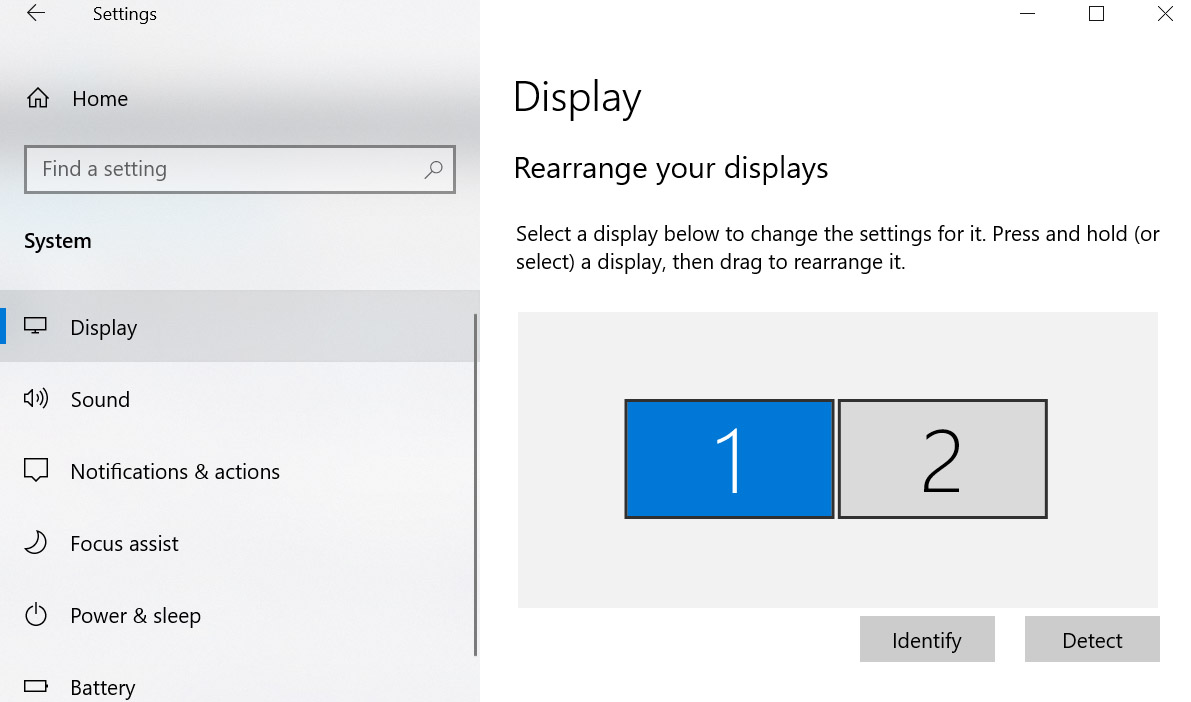
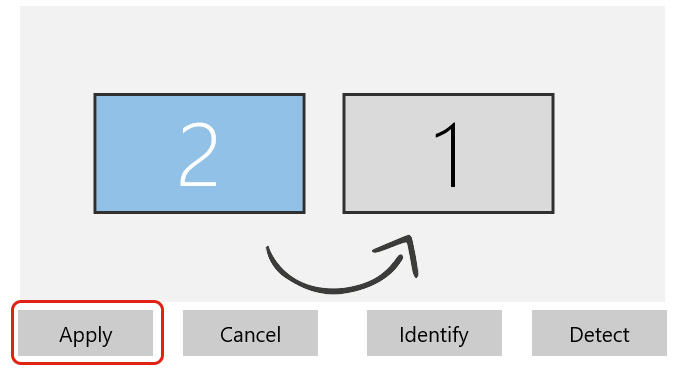
Making sure that your additional monitors are correctly connected and (if necessary) powered up, click on Detect (to make sure your laptop is aware of all attached monitors), followed by Identify and a number will briefly appear on each of your monitors (possibly including your laptop).
Once the additional screens have been detected you ideally want them to operate from left to right, and you should re-arrange them in the settings screen to match their actual position on your workstation. So if the left hand monitor is actually “2”, and the right hand monitor is “1”, click and hold on one of the monitors in Display Settings and drag it (left or right) to where you want it to be. When you are happy, click Apply.
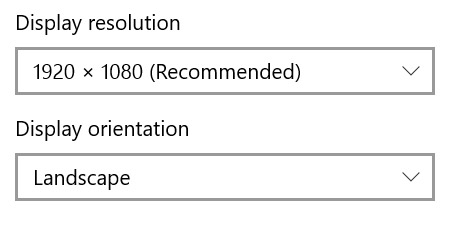
Select a screen resolution that works best for you. Usually a setting that is Recommended by Windows as this is based on the display’s hardware. Also ensure your Display Orientation is set to Landscape.
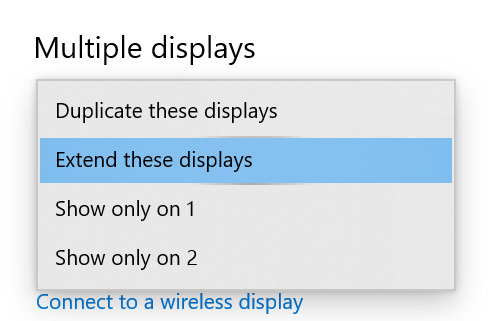
Finally, and possibly most importantly, check the settings in the Multiple displays section. The first time any new monitors are plugged in these additional screens are set to Duplicate these displays, which basically means they act as a mirror of your laptop screen across the additional monitors. Assuming your aim is to have 2 (or 3, including your laptop) monitors all acting as a single desktop display, select Extend these displays from the drop-down menu, which allows you to use them as additional monitors instead. If you are going to keep the laptop screen as part of a 3 monitor desktop, we recommend it be set up in position 1 or 3, whichever suits your work setup best.
But if you are using a laptop and 2 additional monitors and do not want the laptop screen switched on, you can un-check the box labelled Make this my main display, and this switches off the laptop screen, leaving you with the 2 additional monitors only as your display. Obviously if you only attach 1 additional monitor you cannot un-check this box.


© 2026 Labyrinth Technology Limited. Company number 04326900. Web Design by Netzoll
Empowering London Businesses with Efficient IT Solutions to Save Time and Stay Ahead of the Competition.